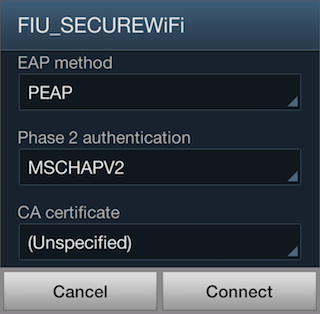
↓Chromebook
- Click on the setting Icon to access your Chromebooks settings
- Click on FIU_SECUREWiFi
- Set the EAP method to "PEAP"
- Set Phase 2 authentication to "Automatic"
- Set Server CA certificate to "Do not check"
- Enter your MyAccounts Username for "Identity:"
- Enter your MyAccounts Password for "Password:"
- Click "Connect"
↓ Linux
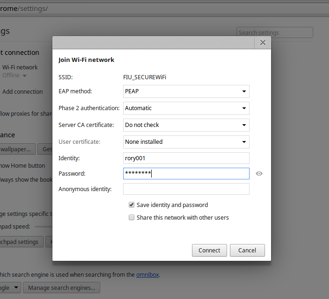
When joining FIU_SECUREWiFi on a Linux system, the profile has to be manually created and CA Root certificate provided.
Click here to download the CA Root certificate.- 1. In ubuntu (v12.04), click the Wifi logo at the top right of your screen and join FIU_SECUREWiFi (Skip to Step 3). Should you already have an FIU_SECUREWifi Profile, simply select "Edit Connections..."
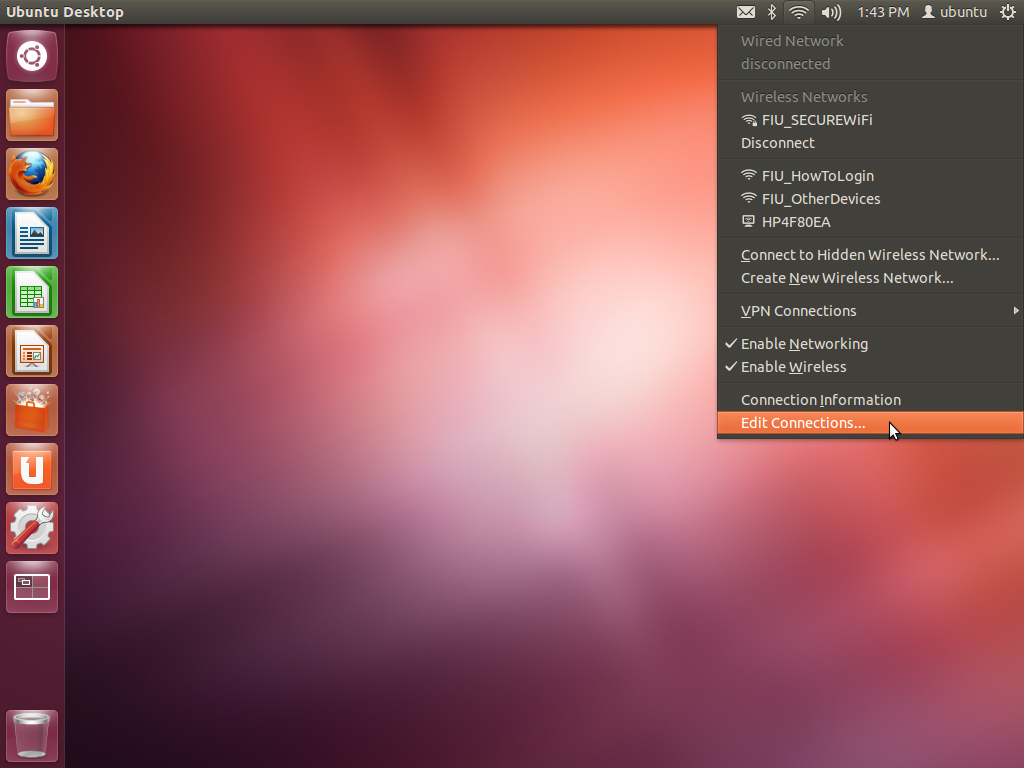
- 2.(FOR EXISTING PROFILES ONLY) Select FIU_SECUREWiFi and click "Edit..."
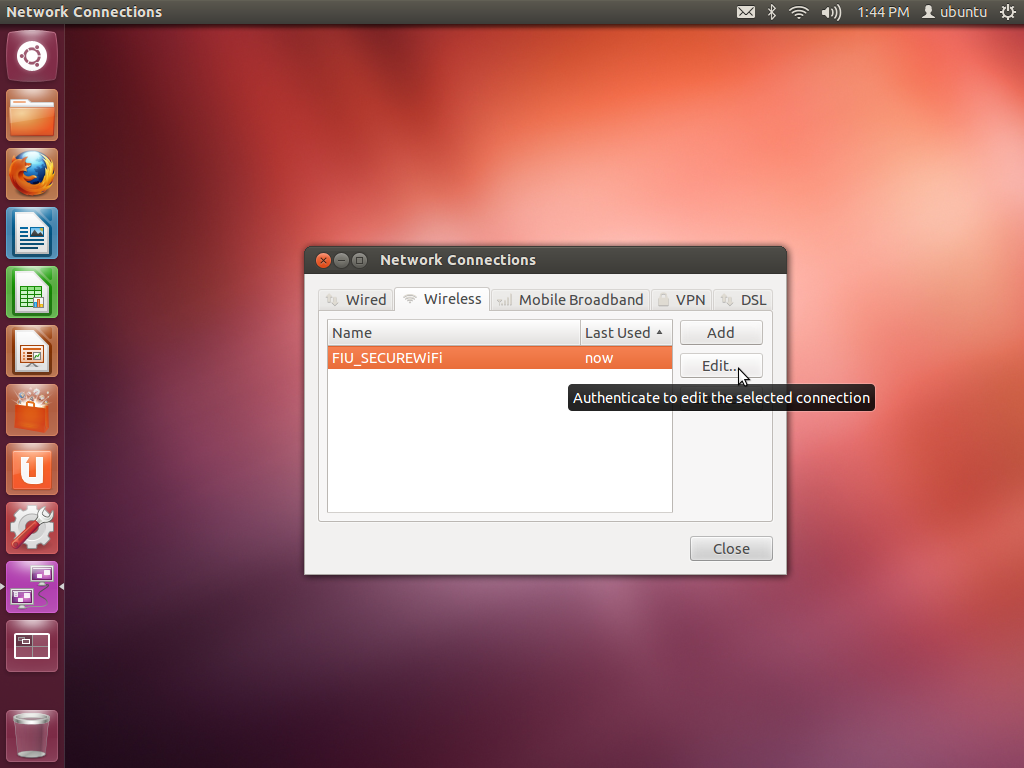
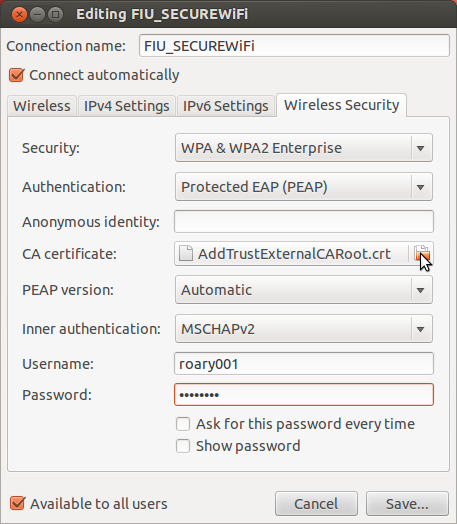
- 3. Click the "Wireless Security" tab.
- Set "Security:" to WPA & WPA2 Enterprise.
- Set "Authentication:" to Protected EAP (PEAP)
- Download this CA certificate, and select it as the "CA certificate:"
- Set "PEAP version:" to Automatic.
- Set "Inner Authentication:" to MSCHAPv2.
- Use your MyAccounts Username for "Username:".
- Use your MyAccounts Password for "Password:".
- 4. Click "Save..."
- 5. You should now be able to browse the web!
↓ Windows XP
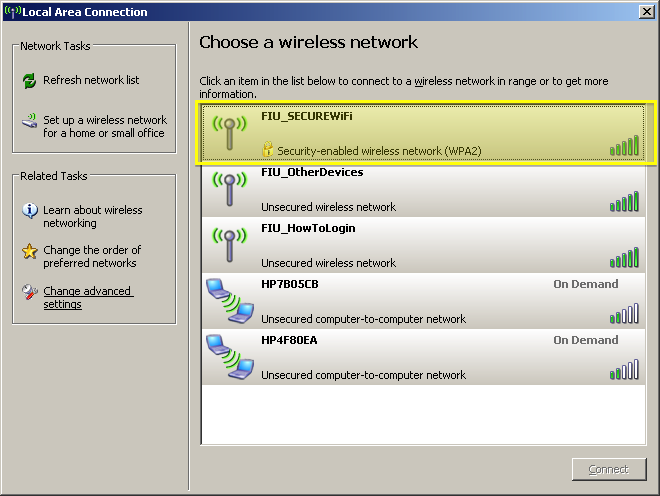
- 1. Click on the wireless networks detected popup.

- 2. Double-Click on FIU_SECUREWiFi and wait until Windows displays "Windows was unable to find a certificate to log you on the network FIU_SECUREWiFi."
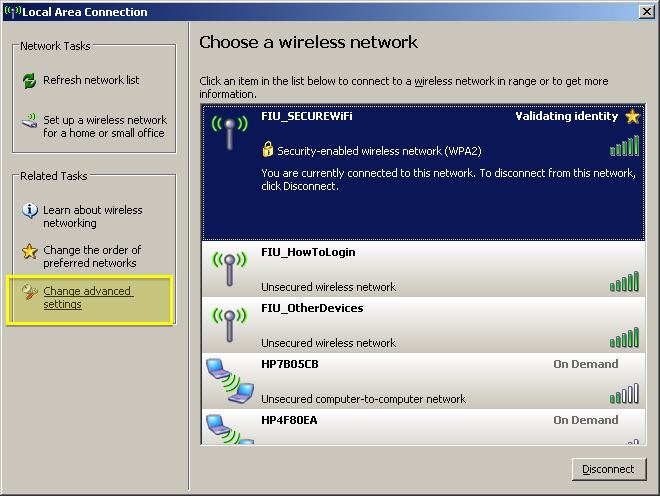
- 3. Single Click on the FIU_SECUREWifi and then click change advanced settings.
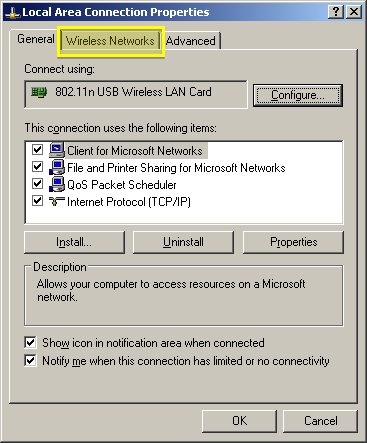
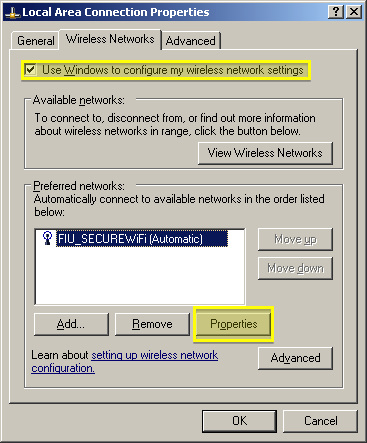
- 4. Select the Wireless Networks tab and verify that the "Use Windows to configure my wireless network settings" box is checked.
- 5. Click on the properties button below the list of preferred networks. Be sure that FIU_SECUREWiFi is highlighted.
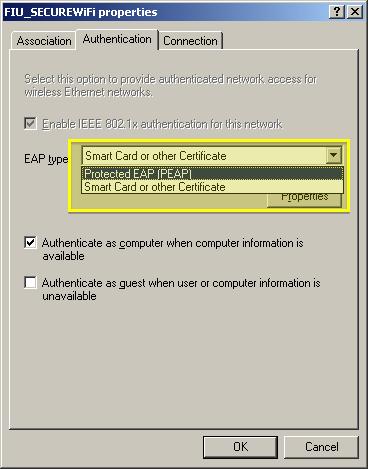
- 6. Once in FIU_SECUREWiFi's properties, select the Authentication tab
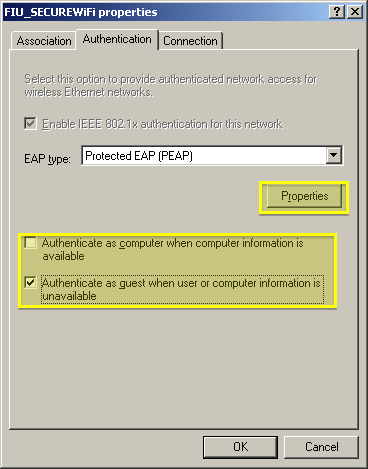
- Change the "EAP type:" dropdown to "Protected EAP (PEAP)"
- Check the "Autheticate as guest when user or computer information is unavailable" box
- Uncheck the "Authenticate as computer when computer information is available" box.
- 7. Click on the properties button.
- 8. Once in the Protected EAP properties, check the "AddTrust External CA Root" box.
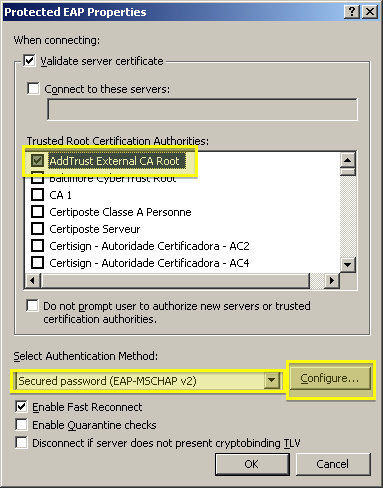
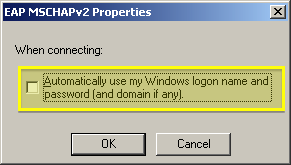
- 9. Click on the configure button next to the "Select Authentication Method:" dropdown. Uncheck the box "Automatically use my Windows logon name and password (and domain if any)" and click "OK".
- 10. Click "OK" to close the Protected EAP Properties Window.
- 11. Click "OK" to close the FIU_SECUREWiFi Properties Window.
- 12. Click "OK" to close the Wireless Network Connection Properties Window.
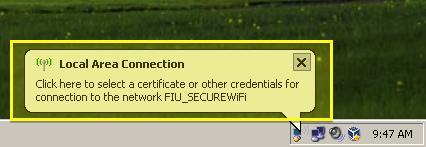
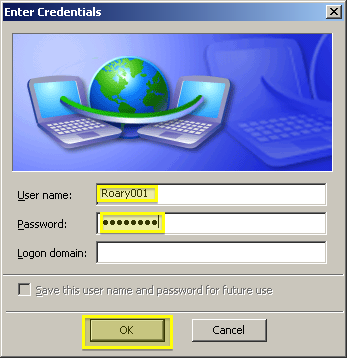
- 13. Click on the Local Area Connection popup and enter in your username and password.
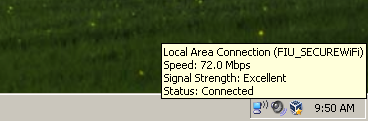
- 14. You should now be able to browse the web!
↓ Android
- * Select MSCHAPV2 from the Phase 2 authentication